Make a presentation
A 'presentation' is a way to use an Ako Map to explain a topic to others. It usually involves showing one part of the map at a time, so you can elaborate on each topic without overwhelming the viewer.
There are two kinds of presentations:
To make a new presentation#
To add a presenation to a map, load the map, then click Overview.
info
If you've published this course publicly, the button will read Course instead.
Now click Presentation, then Create new presentation.
Manual presentations#
A 'manual presentation' is one that you click through, one view at a time. It's as though each view is a different ‘slide’.
A manual presentation has no video. It can either be held remotely (as you click through the 'slides' and others follow along on their own devices), or a viewer can click through the presentation at their own pace.
Making a manual presentation#
When you make a new presentation, you'll see a view that looks like your normal map, but with an extra screen on the left:

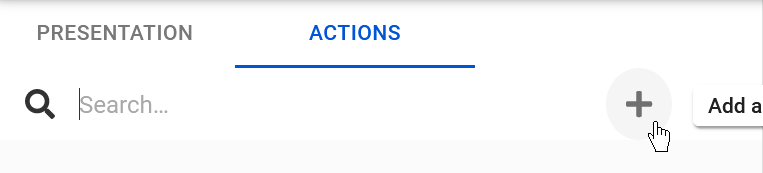
Click to the tab reading Actions.
This is called the 'action list', and it's where you can record all the views or 'actions' that take place within your presentation.
In manual presentations, actions occur sequentially, one after the other. These views are like the sequential 'slides' in a PowerPoint.
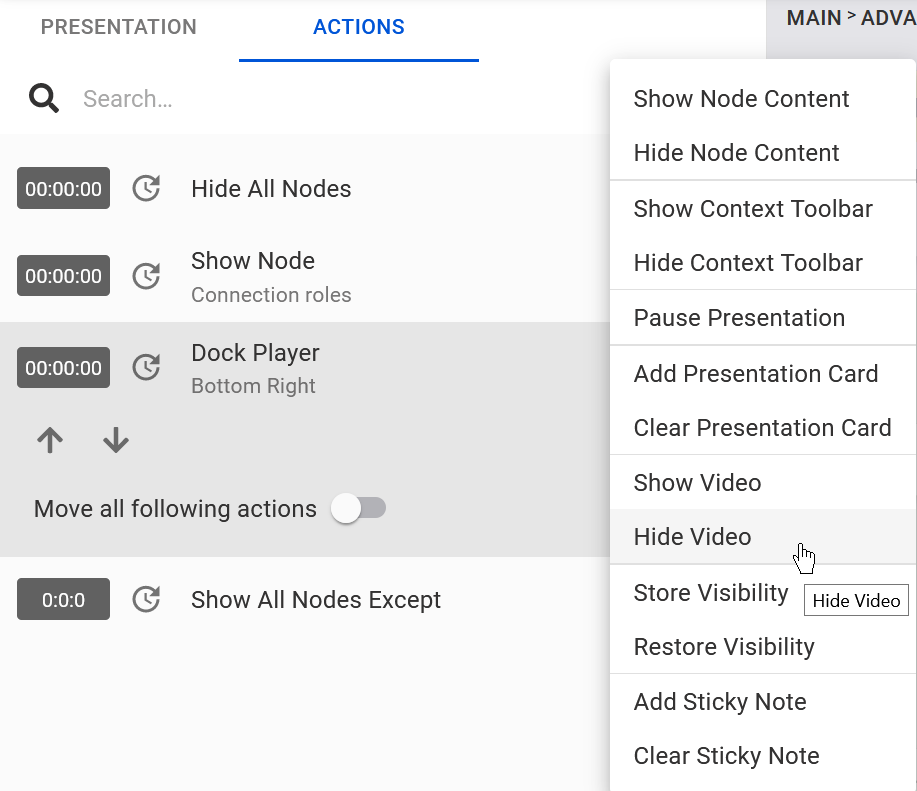
Some common actions you might record are:
- Show nodes (
double-clickthe node, or click theshowicon on toolbar) - Zoom to a neighbourhood (
double-clickthe neighbourhood) - Minimise or maximise the video (
double-clickthe frame of the video, or click themaximise / minimiseicon on toolbar) - Zoom to fit map (
clickthe background outside of any neighbourhood, or click thezoom to fiticon) - Show or hide the node content (by
togglingit on and off in the right sidebar)
By default, all your nodes start greyed out, to show they’re hidden at the start of the presentation.
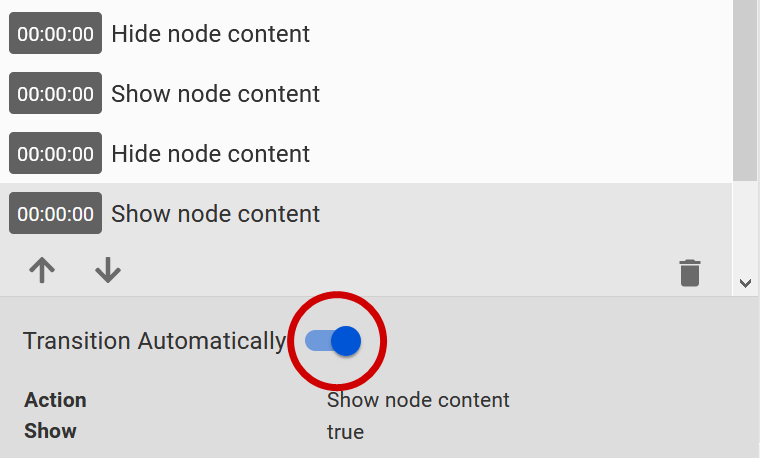
You can swap the order of items in the action list using the ‘up’ and ‘down’ icons:

Sometimes, you might want multiple actions to happen at the same time, without pressing 'next' multiple times when presenting. You can use the Transition automatically toggle to make an action happen without being registered as an action – in other words, you can make multiple actions happen with one click.
Presenting manual presentations#
You can click Presentation then Watch to view your presentation on your own device.
Press the right arrow onscreen or the right arrow on your keyboard to step through the presentation.

You can still interact with your Ako Map at any point in the presentation – for instance, you could open the node content to answer a question about the topic, or show all nodes to see the wider context. However, when you press ‘next’, the screen will return to the correct view for that point in the presentation.
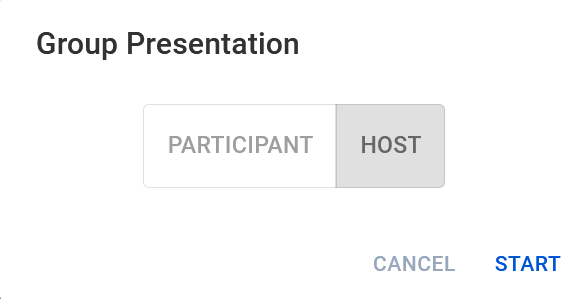
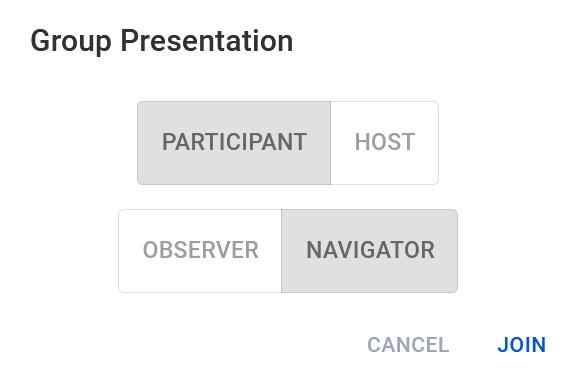
To give your presentation remotely, share your map, then click Presentation, then [your presentation name], then Group presentation, then Host.
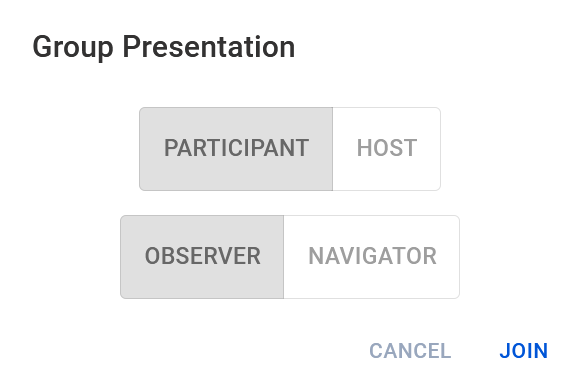
Your participants should click Presentation, then [your presentation name], then Group presentation, then Participant.
If they're just watching the presentation, they should click Observer. If they also need to be able to control the presentation, they should click Navigator.
Regardless of whether they're in Observer or Navigator mode, when you move back or forth through the presentation, their screens will change too.
However, if you make a change to your map that’s not part of the presentation – like opening the content window – the participants won’t see that.
Video-linked presentations#
When you link your presentation to a video, the steps occur automatically at the timestamps you recorded them.
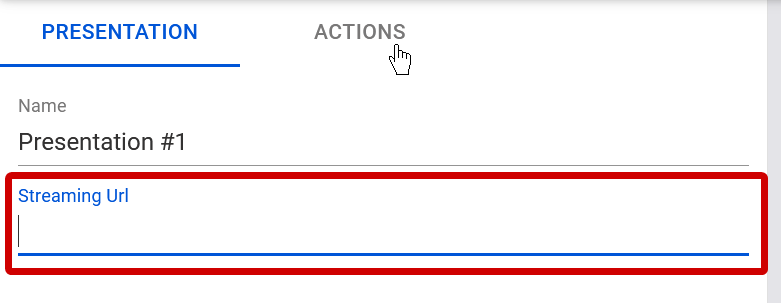
Paste the URL of your video into the field below, then click the tab reading Actions to go to the action list.
Each action’s timestamp is set to the time the video was at when you recorded it. Because of this, you can just press Play on the video and start recording actions to make them happen at the right time.
Video actions#
Most actions (such as double-clicking a node to show it) are the same as in manual presentations).
However, there are some special actions specific to video lessons and presentations:
Maximise / minimise#
Maximise the video to full-screen, or minimise it back down:

Change video size#
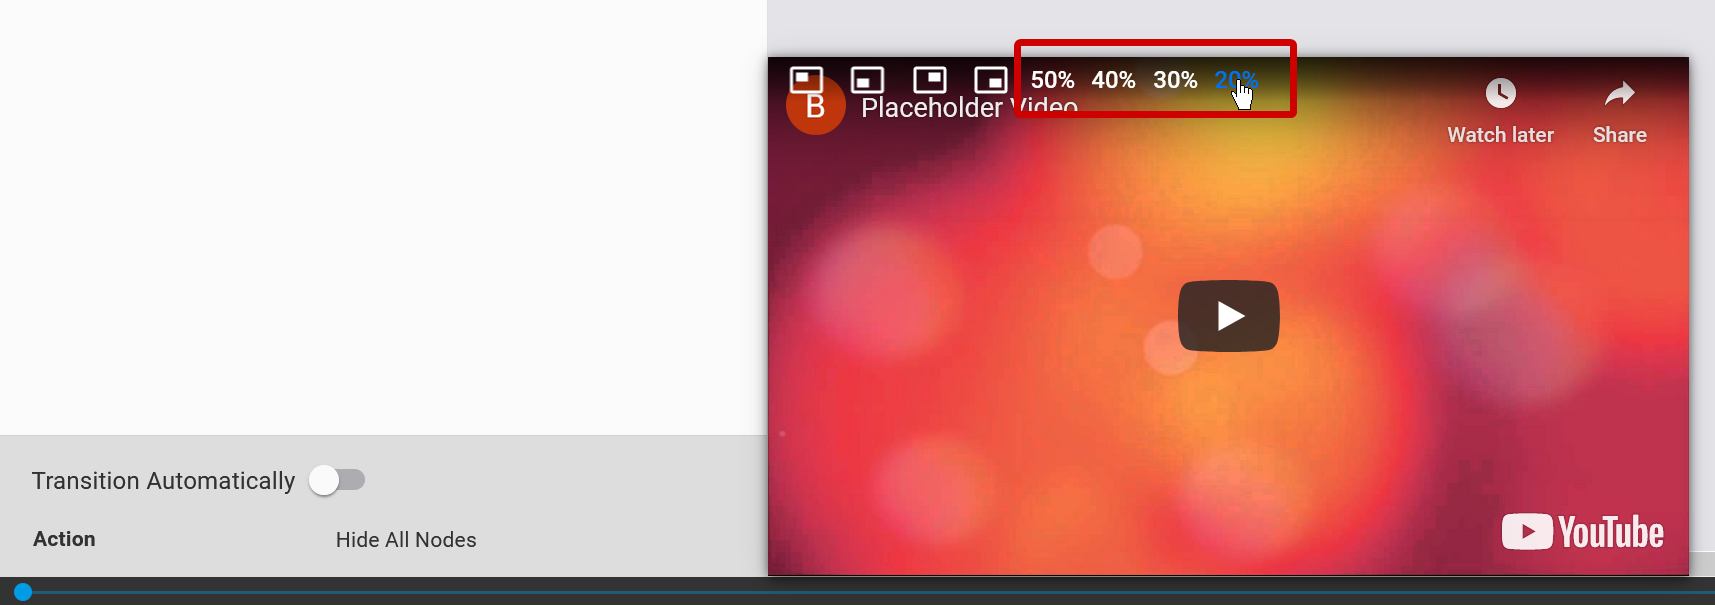
Change the size of a minimised video (by percentage):
Change video corner#
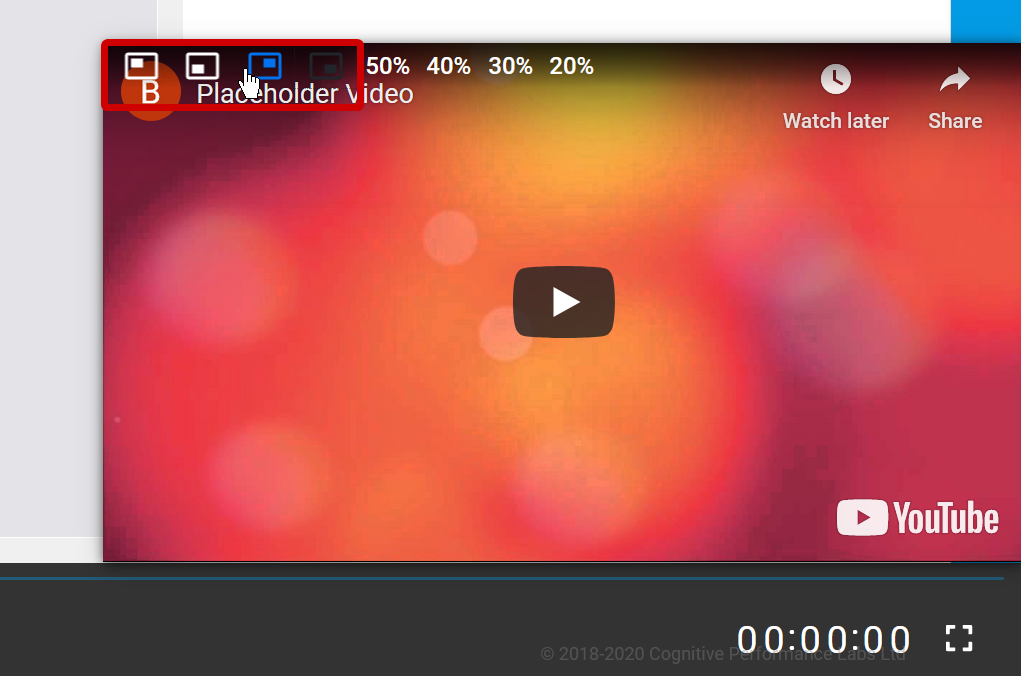
Change which corner a minimised video sits in:
Show / hide video#
Show or hide the video:
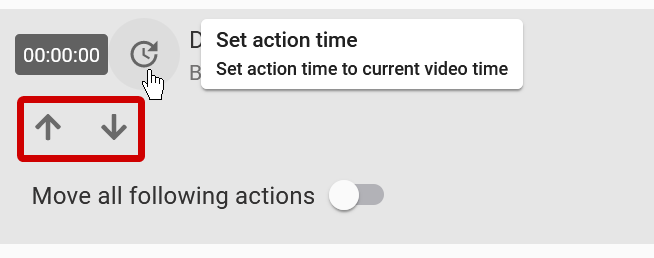
Change timing#
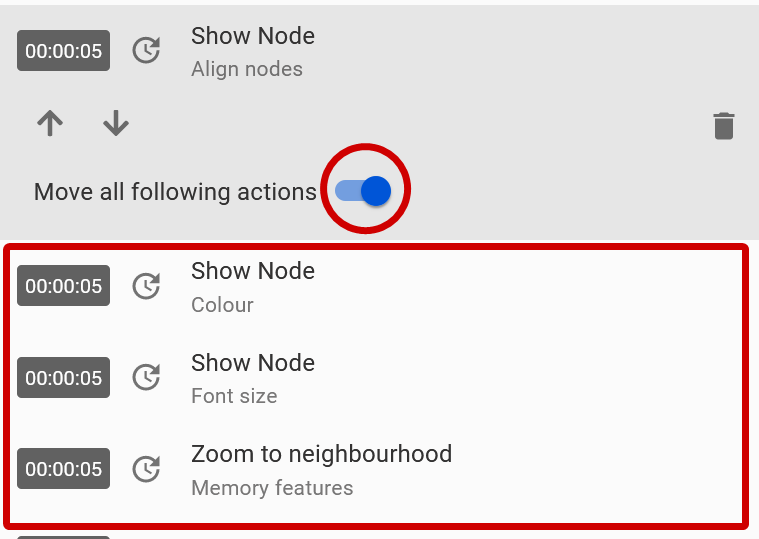
You can adjust the timing of an action one second either way by clicking the up and down icons, or click the Set to timestamp button to set that action to the current time.
When the Move following toggle is on, any changes you make to the timing of the action you’ve currently selected will also apply to all the actions that follow it.
Other actions#
Click this dropdown to see more actions:
Preview presentation#
While you record, you can toggle Preview to see what your map will look like as the video plays:

Otherwise, the map won't change to show an action unless you've just recorded it or you click that action in the action list.
Watching video presentations#
If your recording is a lesson, both the video and map will be shown. The same applies if you ‘watch’ on a presentation.
However, you can also choose to watch just the video in full screen on one device by clicking Group presentation, Host, then Video only.

Participants can watch the video or presentation set by the host by clicking Observer, or watch with control over the timestamp of everyone currently watching the presentation by clicking Navigator.
If a participant is watching a lesson or a presentation on their own, or if they’re in navigator mode during a group presentation, they can double-click a node to jump to the point in the video when it was first shown.